Toolbar چیست؟
Toolbar در نسخه 5.0 سیستم عامل اندروید جای actionbar در اندروید 4 را گرفت تا قابلیت های بیشتری را ارائه داده و یکی از راهکارهای زیبا سازی برای اپلیکیشن شما به شمار خواهد رفت.این widget یا کامپوننت UI از طریق view group به نام Toolbar در دسترس توسعه دهنده قرار می گیرد.
همانطور که می دانید، Toolbar در بالای صفحه نمایش گوشی همراه قرار گرفته، و نشان دهنده چند ابزار کاربردی از قبیل نشان دادن باطری گوشی، نوار جستجو، drawer، منو و … می باشد. امروز در این مقاله مراحل طراحی یک Toolbar سفارشی در اندروید را باهم گام به گام بررسی میکنیم.
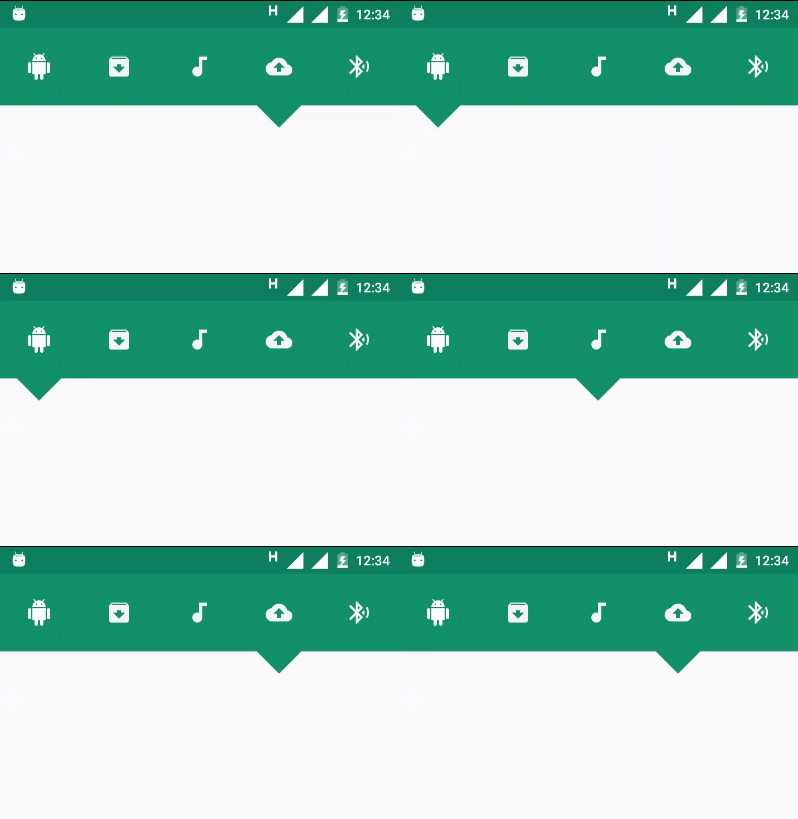
در تصویر متحرک بالا یک Toolbar که شامل 5 fragment (قسمت) می باشد را ملاحظه می فرمایید.
برای ایجاد تولبار در اندروید استودیو ابتدا باید وارد محیط کار اندروید استودیو شویم. پس از این که اندروید استودیو را اجرا کردیم، در قسمت xml پروژه می بینیم که تولبار پیشفرض اندروید استودیو قرار دارد. برای اینکه بتوانیم تولبار سفارشی را ایجاد کنیم قبل از هرچیز باید تولبار پیش فرض اندروید استودیو را حذف کنیم.
برای حذف تولبار پیش فرض اندروید استودیو دو روش پیش روی خود میبینیم که در زیر آن را با هم بررسی خواهیم کرد:
1.حذف تولبار در Manifest:
برای دسترسی به قسمت manifest، طبق عکس زیر ابتدا باید پروژه را از حالت Project به حالت Android تغییر دهیم و از زیر مجموعه manifest، داخل AndroidManidest.xml رفته و کد زیر رابه آن اضافه کنیم.
نکته: کدی که در زیر به برنامه اضافه خواهیم کرد، باید جایگزین کد android:theme=”style/AppTheme شود و کد ما باید فارغ toolbar باشد تا خود بتوانیم آن را ایجاد کنیم.
برای این منظور، کد زیر را جایگزین android:theme=”style/AppTheme می کنیم:
android:theme="@style/Theme.AppCompat.Dark.NoActionBar"
اکنون خروجی اپلیکیشن ما بدون toolbar خواهد بود و ما می توانیم toolbar سفارشی ایجاد کرده و جایگزین آن کنیم.
2.با استفاده از Styles.xml:
به قسمت res رفته و در فولدر values، فایل Styles.xml را انتخاب کنید.
وقتی داخل فایل Styles.xml می شوید، کد زیر را در ابتدای آن ملاحظه می فرمایید:
<style name="AppTheme" parent="Theme.AppCompat.Light.DarkActionBar">
این قطعه کد همان تمی می باشد که دارای تولبار می باشد. برای این که بتوانید این تم را حذف کرده و تولبار طراحی شده خودتان را جایگزین آن کنید، کافیست مانند روش اول این کد را حذف کرده و کد زیر که یک تم بدون تولبار هست را به آن اضافه کنید:
<style name="AppTheme" parent="Theme.AppCompat.Light.NoActionBar">
نکته: بهتر است از روش دوم برای حذف تولبار استفاده کنید چون اصولی تر می باشد.
حال که تولبار پیش فرض اندروید استودیو را حذف کردیم، اکنون می خواهیم تولبار اختصاصی خود را ایجاد کنیم.
برای شروع کار، ابتدا باید به قسمت xml رفته و یک شئ Toolbar مانند تصویر زیر به آن اضافه کنیم:
حال برای تولبار، داخل Xml و در قسمت Text آن، مشخصاتی که قصد اضافه کردن به آن را داریم اضافه میکنیم:
<?xml version=”1.0″ encoding=”utf-8″?>
<LinearLayout xmlns:android=”http://schemas.android.com/apk/res/android”
android:orientation=”vertical” android:layout_width=”match_parent”
android:layout_height=”match_parent”>
<android.support.v7.widget.Toolbar
android:layout_width=”match_parent”
android:background=”#ffce0c″
android:layout_height=”?attr/actionBarSize”>
<LinearLayout
android:orientation=”horizontal”
android:layout_width=”match_parent”
android:layout_height=”match_parent”>

</LinearLayout>
</android.support.v7.widget.Toolbar>
</LinearLayout>
حال باید به main_Activity رفته و تولبارمان را به آن اضافه کنیم; مانند زیر:
<include layout=”@layout/toolbar”/>
اکنون، ما یک تولبار جدید تعریف و به اپلیکیشن اضافه کردیم که مشخصات ظاهری آن را خودمان تعریف کردیم.
اختصاصی سازی Toolbar:
حال که ماهیت کلی تولبار را ایجاد و به برنامه اضافه کردیم، می توانیم آیکن، متن و هر چیز دیگری که برای برنامه نیاز ما خواهد شد به آن اضافه کنیم.
برای اضافه کردن آیکن، همانطور که در مقاله های قبلی نیز به آن اشاره شد، باید به قسمت res رفته و آیکن های دلخواه خود را به پوشه ی drawer اضافه و سپس از آن ها استفاده کنید.
اعمال تغییرات بیشتر بستگی به سلیقه و انتخاب شما و همچنین کارایی اپلیکیشن شما خواهد داشت. در زیر نمونه ای از اختصاصی ایجاد کردن تولبار که ما در این قسمت ایجاد کرده ایم را ملاحظه می فرمایید:
<?xml version=”1.0″ encoding=”utf-8″?>
<android.support.v7.widget.Toolbar android:layout_width=”match_parent”
android:background=”#f0e910″
android:layout_height=”?attr/actionBarSize”
xmlns:android=”http://schemas.android.com/apk/res/android”>

<LinearLayout
android:orientation=”horizontal”
android:gravity=”center”
android:layout_width=”match_parent”
android:layout_height=”match_parent”>

<LinearLayout
android:layout_width=”wrap_content”
android:orientation=”horizontal”
android:layout_weight=”1″
android:layout_height=”wrap_content”>

<LinearLayout
android:id=”@+id/linearFilnalBasket”
android:layout_width=”wrap_content”
android:layout_height=”wrap_content”>
<TextView
android:id=”@+id/txtBasketCont”
android:textSize=”16dp”
android:textColor=”#ffffff”
android:text=”1″
android:layout_width=”wrap_content”
android:layout_height=”wrap_content” />

<ImageView
android:id=”@+id/serch”
android:layout_width=”32dp”
android:src=”@drawable/settings”
android:scaleType=”fitCenter”
android:layout_height=”32dp” />

</LinearLayout>

<ImageView
android:layout_marginRight=”32dp”
android:scaleType=”centerCrop”
android:layout_width=”32dp”
android:layout_gravity=”center_vertical”
android:src=”@drawable/emails”
android:id=”@+id/hambergurMenu”
android:layout_height=”32dp” />

</LinearLayout>

<LinearLayout
android:layout_gravity=”right”
android:padding=”0dp”
android:orientation=”horizontal”
android:gravity=”left”
android:layout_width=”wrap_content”
android:layout_height=”wrap_content”>

<ImageView
android:layout_marginRight=”32dp”
android:scaleType=”fitCenter”
android:layout_width=”100dp”
android:id=”@+id/digikala”
android:src=”@drawable/aaaabi”
android:layout_height=”wrap_content” />

<ImageView
android:layout_width=”32dp”
android:src=”@drawable/help”
android:layout_marginRight=”32dp”
android:scaleType=”fitCenter”
android:layout_height=”32dp” />

</LinearLayout>

</LinearLayout>

</android.support.v7.widget.Toolbar
اکنون تولبار ایجاد شده آماده است و می توانید از آن استفاده کنید. امیدوارم از خواندن این آموزش لذت برده باشید.^.^
آیا شما هم علاقه مندید مباحث اندروید استودیو را به صورت حرفه ای تر و کاربردی تر آموزش ببینید؟ آیا برای کسب و کار آنلاین خود نیاز به طراحی اپلیکیشن اندروید دارید؟ اگر علاقه مند به یادگیری برنامه نویسی اندروید هستید یا قصد سفارش این موارد را دارید، شرکت پدیده تجارت با ده سال سابقه رسمی در زمینه برنامه نویسی تحت وب و مباحث IT، عضو اتحادیه و با افتخار و آغوش باز از شما استقبال خواهد کرد.
جهت مشاهده ی نمونه کارهای اندروید شرکت پدیده به قسمت نمونه کارهای اندروید و همچنین برای اطلاع از دوره های آموزشی اندروید، به قسمت دوره های آموزش اندروید شرکت پدیده تجارت مراجعه فرمایید.
*آینده از آن کسب و کارهای آنلاین است*
تولید شده در بخش تولید محتوا پدیده تجارت








5 پاسخ
Fastest Way to Build a Profitable Business!
If you’re new to online marketing, you’re probably hoping to supplement your income with a side hustle.
There are tons of ways to generate an income online such as niche sites, freelancing, ecommerce, Kindle publishing (KDP) and more.
But here’s the problem…
Most of these methods are solid and proven – but they take too long. Some, such as ecommerce, require capital too.
Here’s the solution…
The fastest way to build a 4-6 figure online business will be to start selling your own infoproducts!
It’s not as difficult as it sounds and most newbies find that this is the easiest business model of the lot.
To Your Success,
Mark
PS. Build your infoproduct empire with $0? Discover how this forever free platform that has helped many beginners to profit online [https://stopify.co/F75JUL]
Grab Google Workspace business email accounts for just $1.75 per account per monthly This is an unbeatable deal you’ll come across, crafted to designed to save you money while giving you all the tools you require to stay on top of things and professional.
We’re a certified Google reseller, so you’re receiving reliable, dependable service directly connected to Google. Handle your business communications smoothly with secure, business-grade email accounts that are easy to configure and maintain.
Visit https://bit.ly/workspaceacc
* You can buy new accounts or transfer your existing accounts seamlessly with all accounts and data preserved.
If you don’t want to get a message from me anymore, please hit reply with the text: “No Thanks”